6.11 (VHDL) Initialize Array from File |

|

|
|
6.11 (VHDL) Initialize Array from File |
|
|
6.11 (VHDL) Initialize Array from File |
|
|
|
6.11 (VHDL) Initialize Array from File |
|
|
In VHDL, project-level array variables can be initialized with data from a file during the test bench generation process. The data is read from the file during the test bench generation (not at simulation time) and written in the code of the top level test bench. To dynamically read from a file during simulation instead, use the technique described in Section 6.9 Input Data Dynamically from a File (VHDL)).
In VHDL, you will first add the data file to the Initialized Variables folder, then press the Make TB button to generate the code. Inside a timing diagram, use @filename_init.columnname[index] notation to access the file variable, where index is the row number of the data to use.
1) Create a data file:
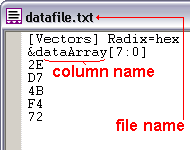
•Create a data file in the SynaptiCAD Test Vector File Format as described in Section 6.7 SynaptiCAD Test Vector File Format. •For VHDL, the file should contain one or more tab separated columns with data. Each column will represent one array field in a structure. Each field will be an array with the size of the arrays being set by the number of rows in the file. |
|
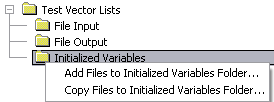
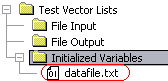
2) Add file to the Initialize File Folder to automatically create the class and variables:
•Under the Test Vector Lists folder, right click on Initialized Variables to open the context menu. The Add... menu adds the file without moving it, and the Copy... menu copies the file to the Project directory and then adds it. |
|
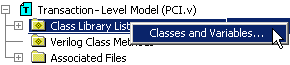
Investigate what got created when you added the file:
•Right click on the Class Library List folder and choose Classes and Variables to open the Classes and Variables dialog. |
|
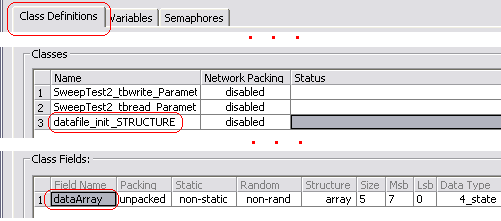
•Under the Class Definitions tab, notice there is a class called filename_init_STRUCTURE.When you select the class, notice that the class fields are named after the columnnames. |
•Click on the Variables tab and notice that there is an project-level instance of the file class named after the filename. Inside a timing diagram, you can access this variable using the @filename_init.columnname[index] notation, where index is the row number of the data to use. |
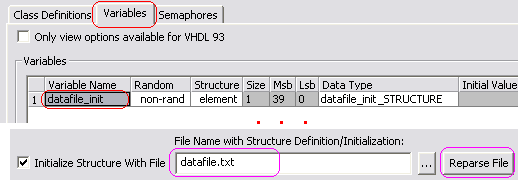
•If at some point the data file column names are changed, you can use the Reparse File button, located at the bottom of the dialog, to recreate the class and file column names. |
•Note: After adding the file, you can double click on the file name to view the data or edit it. |
|
3) Generate the Test Bench:
•Press the Generate Test Bench button on the simulation button bar. This collapses then expands the macros in the template file. |
|
Investigate the code that got generated:
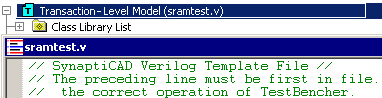
•Double-click on the Transaction-Level Model folder in the Project window to open the template file. |
|
•Search for one of the column names. The code generation should look something like the image shown. |
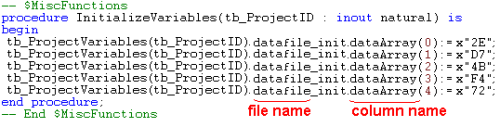
4) Reference the Variable.ColumnName inside a Diagram
•Double click on a waveform segment to open the Edit Bus State dialog, then press the Variable button to open the Select Variable dialog. |
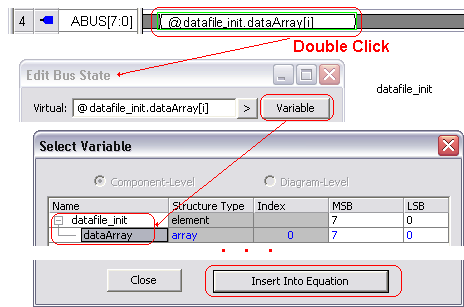
•In the Select Variable dialog, highlight the column name element and press the Insert Into Equation button to insert the file variable into the waveform. •The array will come in with an index of 0, so you will probably want to replace the 0 with a variable name that can access the different elements of the data array. |
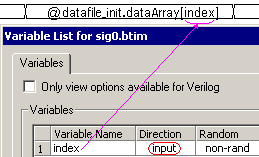
•To make a variable that is an input to the timing diagram transaction, press the View Variables button on the diagram window and create a variable that has a direction of input. •This variable will be an input in the Apply call to the timing diagram, so you can set the index each time the diagram is called. |
|