9.1 Sub-Projects |

|

|
|
9.1 Sub-Projects |
|
|
9.1 Sub-Projects |
|
|
|
9.1 Sub-Projects |
|
|
TestBencher Pro supports hierarchical TLM design by allowing projects to be instantiated inside other projects. This lets you develop and verify complex test benches in an incremental manor. For example, if you are designing a test bench for an ATM switch, you can develop a project that can transmit an ATM cell to an interface port on the ATM switch. After you have tested your transmitter project, you can make it a sub-project and instantiate a copy of it for each different port of the ATM switch.
General Sub-Project Design Flow:
•Design and debug each TestBencher project that will become a subcomponent of a larger project. •In the larger project, add the sub-project to the Project Library folder so that the larger project has access to the sub-projects files (see the instructions below). •Set the default signal mappings to use when the sub-component is instantiated (see the instructions below). •Instantiate the sub-component inside the larger project and set the port mapping. You may create more than one instance of the sub-component (See Section 9.2 Component Instances of Sub-Projects). |
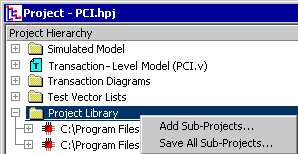
Add a sub-project to the Project Library folder:
•Right-click on the Project Library folder and choose Add Sub-Projects menu. This opens a file dialog that lets you browse for projects. After you close the dialog, a sub-project with a red chip icon is added to the folder. |
|
The sub-project can be modified while the owning project is open, by expanding the sub-project tree. The sub-project will remain an independent project that can be opened and edited alone, as well.
Setup default mappings
Once you add the sub-project, you will need to setup the signals to be exported and the default mapping names for the component.
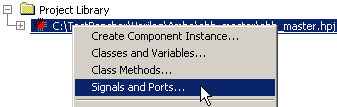
•Right-click on the sub-component (red chip icon) and choose Signals and Ports from the context menu. This opens the Component Model Signals and Ports dialog. |
|
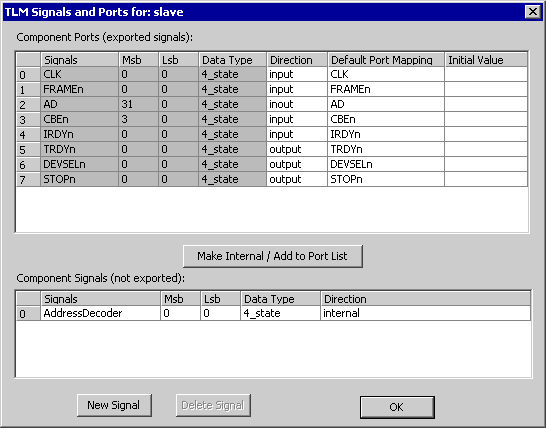
•Create ports for the sub-project by selecting signals in the Component Signals (not exported) section and clicking the Make Internal/Add to Port List button. This will move the signals up to the Component Ports (exported signals) section. Signals can also be dragged from one list to the other. •Double click on cells in the Default Port Mapping column and either type in a name or select a mapping signal name. Since the sub-project is not the real component you can type in partial names. For example if you plan to connect each instantiation of the sub-project up to a different port of the MUT with port names like signame0 and signame1, a good partial port name would be signame. That way, after you instantiate the components you will only have to add the port numbers to the signal names. |
For more information on the Signals and Ports dialog see Section 9.5 Signals and Ports for Components.