7.3 Images and Word Processors |

|

|
|
7.3 Images and Word Processors |
|
|
7.3 Images and Word Processors |
|
|
|
7.3 Images and Word Processors |
|
|
There are several different ways to convert your timing diagrams into image files. Image files can then be embedded into word processors, graphics packages, and page layout programs. Also the next section shows how to link an image to a timing diagram file for quick editing using OLE (see Section 7.4 OLE). There is also supplemental information on image generation located in SynaptiCAD > Help> Images.doc, which compares and contrasts different image types.
Windows Bitmaps using the Clipboard (Windows Only)
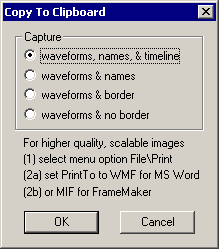
•Select the Edit > Copy Bitmap to Clipboard menu option to open the dialog. •Choose what objects to capture. The time range will be the displayed range on the screen. When the dialog is closed the bitmap image will be in the Windows clipboard. •Inside your graphics or word processing program use the Edit > Paste menu command to embed the image into your document. •Note that this is the lowest quality image generated by the editor, but it is quick and easy to use. |
|
Image Formats using the Print Dialog
•Select the File > Print Diagram menu to open the Print dialog. •Choose an Image file format from the Print to box (WMF, MIF, CGM, EPS, SVG, TIFF, or PNG). •Enter a file name into the File Name box •Press the Ok button to generate the file. |
|
Format Quality Overview
Name |
Type |
Ease of use |
Comments |
Copy-to-Clipboard |
Windows bitmap |
very easy |
medium quality images which cannot be sized or scaled without losing resolution |
WMF metafiles |
vector metafile |
very easy |
excellent quality images which can be sized or scaled - recommended for Microsoft Office/Windows Apps |
MIF files |
vector file |
moderately easy |
excellent quality images - for use with FrameMaker only |
SVG files |
vector |
very easy |
web-ready, loss-less data compression (free tools available), supports cross platform images |
TIFF files |
raster |
very easy |
loss-less data compression, high quality |
PNG files (DataSheet Pro) |
raster |
very easy |
web-ready, loss-less data compression, high quality |
JPEG files (DataSheet Pro) |
raster |
very easy |
web-ready, lossy data compression |
CGM metafiles |
Vector metafile |
moderately easy |
excellent quality images - support for cross-platform images |
EPS files |
Vector file |
most difficult |
excellent quality images - recommended for cross-platform images and data books |
Special Image Instructions:
•When the EPS file is selected, a preview check box will be enabled. Embedding a preview into the eps allows the file to be displayed (as a bitmap) within a word processor, but when the document is printed then the vector EPS information is used for printing. Without a preview, imported EPS files generally show up as a gray or white box in most applications. Two different preview formats are available: Tiff 5 which is compatible with Microsoft Office applications, and Interchange which is compatible with FrameMaker. Previews make an EPS picture viewable inside an application, but the trade-off is an increase in the size of the image. Setting the Dots Per Inch (DPI) edit field controls the resolution and size of the preview image. For more information on EPS support please view the image.doc file included on the distribution disk. •When the MIF-FrameMaker file is selected the Margins section of the dialog has different controls that can be used to set the horizontal MIF image size. The Specify Image Size enables the width edit box, and the Width box sets the width of the MIF image in inches. |