Step 3: Extract Ports into Template Diagram |

|

|
|
Step 3: Extract Ports into Template Diagram |
|
|
Step 3: Extract Ports into Template Diagram |
|
|
|
Step 3: Extract Ports into Template Diagram |
|
|
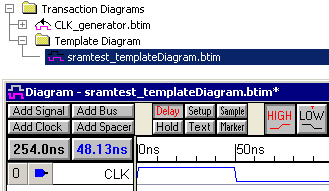
When TestBencher created the project, it also generated a template diagram. New transaction diagrams will contain the same signals, waveforms, parameters, and properties as the template diagram. It is a good idea to setup the template diagram before creating the timing transactions so that all of the timing transactions will have the same interface signals.
Open the Template Diagram:
•In the Project window, under the Template Diagram folder, double click on diagram named projectname_templateDiagram.btim to open the template diagram window. |
•If a default clock was created during the Project creation step, then the template diagram will contain the clock as an input signal, and there will also be a clock generator diagram that contains the clock as an output. The clock should only be driven by one timing transaction so that it can be properly aborted at the end of simulation. |
|
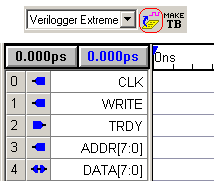
Extract the ports of the MUT into the template diagram:
•Click the Extract Ports from MUT button to build the MUT and insert the signals for the MUT ports into the template diagram. •The blue icons indicate the direction of the signals. Use the mouse to hover over the direction icons and a tool-tip will tell you what each image means. |
|
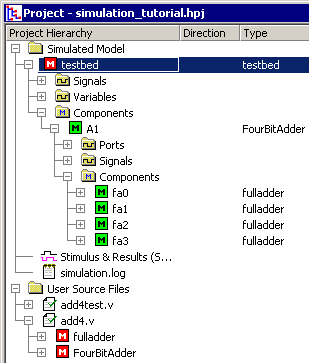
•By default, TestBencher extracted ports from the top-level models (those not instantiated within other models). •After the first build, you can optionally right click on other modules and choose Set as Model Under Test to control which models are instantiated in the test bench. •Notice that the User Source files have green check marks to indicated that they are built. •Double clicking on any component will open a editor scrolled to that place in the code. |
|
•Add other graphical objects, end diagram markers, and variables that you want to appear in all the test bench transactions. •Choose the File > Save Timing Diagram to save the template diagram. |