Step 1: Create a Project to hold the MUT |

|

|
|
Step 1: Create a Project to hold the MUT |
|
|
Step 1: Create a Project to hold the MUT |
|
|
|
Step 1: Create a Project to hold the MUT |
|
|
The project for the Reactive Test Bench Option is very simple because it just holds the model under test files and the generation language setting. If you are running the BugHunter interface, the project will expand to show a hierarchical view of the models and the stimulus-and-results diagram. Actel Libero users can skip this step because they will create the project in Libero, and Libero will launch WaveFormer Lite and extract the signals automatically.
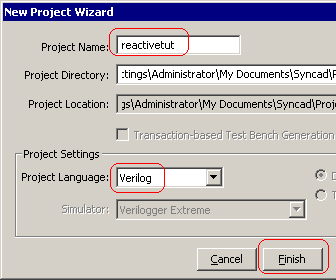
Create a Project
•Choose Project > New Project menu function to open the New Project Wizard dialog. •In the Project Name box, type in the name. This will be both the name of the project and the directory where the project and associated files are stored. •Use Project Language to set the parser language for the model under test files. •Click the Finish button to create the project and close the dialog. |
|
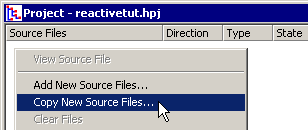
Add the Model Files
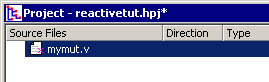
•In the Project window, under the Source Files section, right click and choose Copy New Source Files from the context menu. The picture shows WaveFormer's interface. BugHunter and TestBencher projects have a User Source Files folder that you can right click on. This will open a file open dialog. |
|
•Use the Browse button to find the model under test files and add them to the project. |
|
Extract the MUT Ports
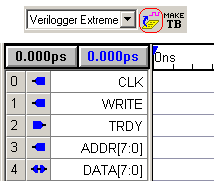
•Press the Extract MUT ports into Diagram button on the main window button bar to extract the top level ports from mymut.v and dump them into a timing diagram window. |
|