3.5 Using Sample Variables |

|

|
|
3.5 Using Sample Variables |
|
|
3.5 Using Sample Variables |
|
|
|
3.5 Using Sample Variables |
|
|
Two sample variables are automatically generated for each sample: SampleName_process_Flag and SampleName. The SampleName_process_Flag variable is a Boolean flag that indicates whether the sample condition was true or false. SampleName is a state variable that contains the value of the sampled signal at the time the sample’s condition was met or timed out. These are diagram-level variables and can be referenced anywhere in the timing diagram including other sample’s actions and conditions, HDL Code Markers, and Class Methods.
Using a Sample's Flag condition to trigger the "if condition" of a subsequent sample:
It is frequently desirable to define a sample condition in terms of previously executed samples. For example, you might wish to execute an action if two different previous samples were both true. This can be accomplished by writing HDL code accessing the flag variables that store information about previously executed samples. Assume you have a diagram with three samples (SAMPLE0, SAMPLE1, and SAMPLE2) where the first two samples test the values of two signals. To make SAMPLE2 true if both SAMPLE0 and SAMPLE1 are true, you would enter the User-Defined Condition of SAMPLE0_process_Flag and SAMPLE1_process_Flag.

Using a Sample's Value in the Diagram
You can also use a sample's value variables to build user-defined conditions for samples. For example, to test that the value sampled by SAMPLE0 is equal to the value sampled by SAMPLE1, enter the following User-Defined Condition for SAMPLE2.

The size of the sample value will depend on the size of the signal that it is sampling. So for the above equation to work, the types of the signals sampled by SAMPLE0 and SAMPLE1 must be the same, or you will get a type mismatch error when you compile your test bench.
TestBencher can export sample variables as outputs from the timing diagram:
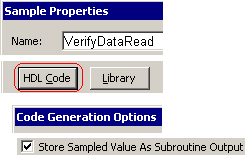
In TestBencher, the sample value, SampleName, can also be exported from the transaction by checking the Store Sampled Value as Subroutine Output checkbox in the Code Generation Options dialog.
•Double-click on the Sample name to open the Sample Properties dialog. •Press the HDL Code button to open the Code Generation Options dialog. •Check the Store Sampled Value as a Subroutine Output box at the bottom of the dialog. |
|
In TestBencher, the Store Sampled Value As Subroutine Output checkbox creates an output port to the transaction and when the transaction terminates it passes the sampled value out to the port. How this is implemented depends on the generation language:
•In Verilog, TestBencher will automatically create a variable in the top-level project that contains the diagram. The variable will be named transactionName_sampleName and at the end of the transaction the sample value will be passed out to this variable. •In all the other languages, you must create a variable in the calling project that has the same type as the signal that is being sampled. This variable is then passed into the transaction apply call. The variable will be set during the transaction execution. |