Parameter Libraries (Tutorial 3)
This tutorial explains how to use the library functions of WaveFormer Pro, TestBencher Pro, VeriLogger
Pro and Timing Diagrammer Pro. It starts up where the basic tutorial ends. If you do not want to go
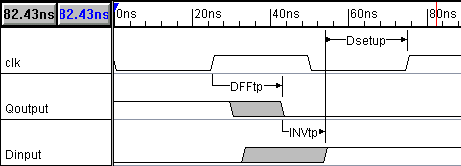
through the first tutorial, a completed diagram of the first tutorial
is on your disk under the filename tutorial.tim (can be loaded directly by clicking on the tutorial
icon). A completed diagram of the Library tutorial is also on your disk under the filename
tutlib.tim if you wish to check your diagram at the end of this tutorial.
Getting Started
First, configure your program, and load the file tutorial.tim.
-
Minimize the Report window (and Project window if applicable). They are not used in this
tutorial.
-
Select the Window > Tile Horizontally menu option. Both the Diagram and the Parameter
windows should be visible during this tutorial. If you are unable to view one of the windows, use the
Window > Parameter or Window > Diagram menu option to open the missing window.
-
Select the File > Open Timing Diagram menu option.
-
Select thetutorial.tim file from the directory where your product is installed.
-
Click Open to load the file.
1) Adding Parameter Libraries to the project's "Library Search List"
In order for a project to use a library, it must know the library's name and path location. This information
is kept in the project's library search list.
To edit the library search list of the tutorial.tim file:
-
Select the Libraries > Parameter Library Preferences menu option. This opens the Parameter
Library Preferences dialog.
-
Click the Add Library to List button
 to open the Parameter Library Browse dialog to search for libraries on your disk.
-
Select the two sample libraries ac.txt and 3ac.txt.
-
Click the OK button. This adds the selected files to your search list, and close the Parameter
Library Browse dialog.
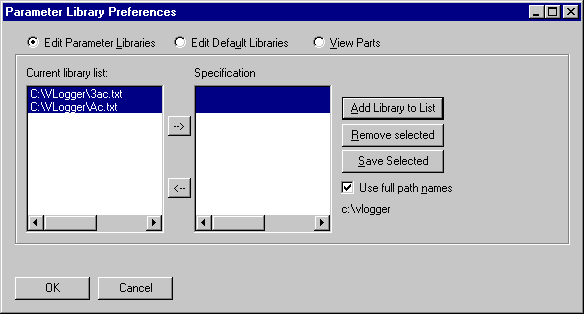
Now in the Parameter Library Preferences dialog, both libraries should be selected in the library
search list path section. The next section also uses the Parameter Library Preferences dialog
so leave it open.
Note: the filenames for the libraries will have their path names attached unless you have unchecked
the "Use full path names" check box. Generally you will want to leave this option checked
as this allows you to use libraries in multiple directories.
2) Setting Parameter Library Specifications
After adding libraries to the project's search list, you need to define the library specification. Library
specifications allow SynaptiCAD products to distinguish between similarly named parts in different parameter
libraries. Libraries 3ac.txt and ac.txt contain parameters with the same names. If you do not assign
specifications and you referenced these parameter names in your design, the values from the first library
in the list would be used.
To assign specifications:
-
Select both the 3act.txt and the ac.txt library files.
-
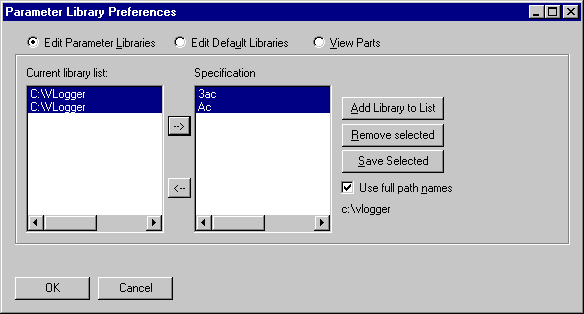
Click on the right arrow button
 in the Parameter Library Preferences. This will assign specifications to the selected libraries.
Now the specification for ac.txt is "Ac" and the specification for 3ac.txt is "3ac".
To eliminate the specification for a library, select it and press the left arrow button.
3) Startup Parameter Library Configuration
Another useful feature of the Parameter Library Preferences dialog which we will not use in this
tutorial is the Edit Parameter Libraries and the Edit Default Libraries radio buttons.
The Edit Parameter Libraries radio button should currently be selected. This allows you to change the
parameter library settings for the current project. If you have a set of libraries that you wish to
use with all new projects, select the Edit Default Libraries radio button and add these libraries to
the Startup library search list. These libraries will not be added to the current project, but any new
project will automatically have these libraries included in their library search list.
Close the Parameter Library Preferences dialog:
-
Make sure the Edit Parameter Libraries radio button is selected.
-
Click the OK button to close the Paramter Library Preferences dialog.
4) Referencing Parameters in Libraries
Now that we have added the libraries and set the specifications, we want to reference the library parameters
in our project.
-
Double click on the min value of the DSetup parameter (in the Parameter window) to edit
the value. This opens the Parameter Properties dialog box.
-
Delete the value in the min edit box, then press the Library button
 to open the View Parameters in Libraries dialog.
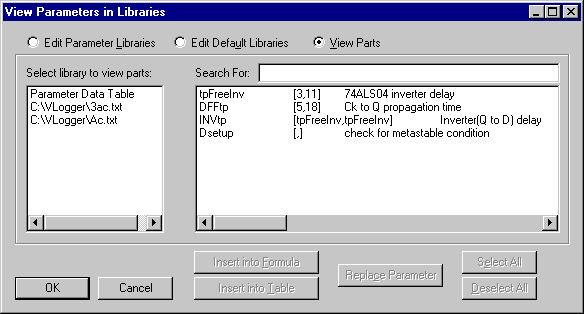
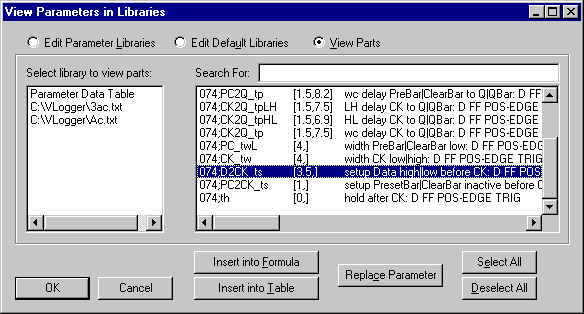
- Notice that there are three libraries on the library list; the 3ac.txt and Ac.txt that you
added, and one called Parameter Data Table. This extra library is a virtual library that lists all the
user-added parameters in the project. You can use virtual library parameters in formulas just like regular
library parameters.
-
Select the Ac.txt library from the library list. This displays the parameters in this library
in the library parts list on the right.
-
Scroll down in the library parts list to find the parameter 074;D2CK_ts. Left click to select
the parameter, and press the Insert Into Formula button
 . .
-
Click OK to close the View Parameters in Libraries dialog.
You are still in edit mode in the formula edit box, but now it should contain the name of the parameter
we just inserted (Note: the library specification "Ac" is added to the parameter name, separated
name by a colon, i.e. +Ac:074;D2CK_ts).
Next, we will edit both the min and max value of the delay INVtp at the same time.
-
Double click on the INVtp parameter (in the Parameter window) to update the Parameter
Properties dialog display with the values for INVtp.
-
Click on the Library button
 to open the View Parameters in Libraries dialog.
-
Select the Ac.txt library and insert the parameter 004;tp into min value. (Select the
parameter and press the Insert Into Formula button
 ). ).
-
Choose the OK button to close the View Parameters in Libraries dialog.
- Notice that the ac:004;tp parameter was added to the values that were already in the min and
max edit boxes.
-
Delete the original values from the min and max edit boxes, leaving only the ac:004;tp value.
-
Click the OK button to close the Parameter Properties dialog.
Repeat the above process for the min and max values of DFFtp, inserting 074;CK2Q_tp from the
ac.txt library. Try using the Search For edit box in the View Parameters in Libraries
dialog, instead of scrolling, to find a parameter name.
5) Using Macros to Examine Tradeoffs Between Different Libraries
Your diagram is now using values for the AC logic family operating at 5V. If you want to examine the
impact of changing your design to 3.3V, you need to change the library specifications of the parameters
to "3ac". It can get tedious changing back and forth between different libraries when you
have to change the name of each parameter. To avoid this you can create a macro which you use in place
of the library specification in your parameter names. Then to change libraries you just need to change
the value of the macro.
To create a macro:
-
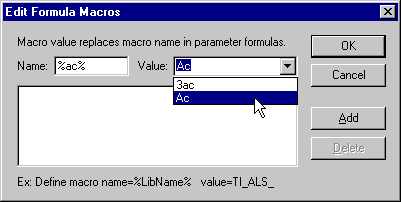
Select the Libraries > Macro Substitution List menu option to open the Edit Formula Macros
dialog.
-
Enter %ac% into the name edit box.
-
Select Ac from the Value drop down box. The drop down box contains all libraries that
have specifications.
-
Click OK to add the macro to your macro list.
Now edit the five min & max values of your parameters, replacing ac with %ac%. Your
design should still be using the 5V AC values. When editing the values, try using the Next
 and Previous
 buttons in the Parameter Properties dialog
to move between parameters.
To make your design reference the 3V library, change the value of the macro.
-
Select the Libraries > Macro Substitution List menu option, to open the Edit Formula Macros
dialog.
-
Click on the macro %ac% in the list box. This places this macro into the Name/Value edit boxes.
-
Use the Value drop down box to change the value of the macro to 3ac. Click OK to
close the dialog.
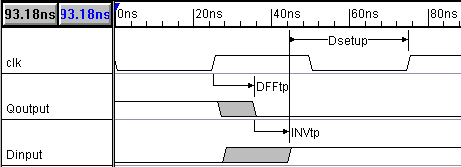
Your design should now be using the 3V AC values (the delays should be longer due to the decreased supply
voltage). You have now completed the parameter library tutorial.
Note: Macros can also be used to make short or alternative names for library parameters without
having to edit the library names.
|